Heres a little something I created earlier.
Seized Heater Fan Motor?
A guide to freeing up that seized heater fan motor
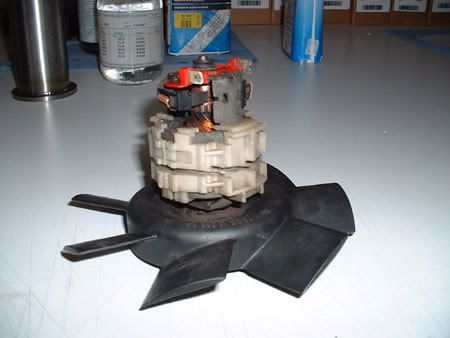
This guide will take you through the simple steps to freing up that seized heater motor fan. I will assume that you already have the heater matrix out of the car and have stripped it to remove the fan and motor.
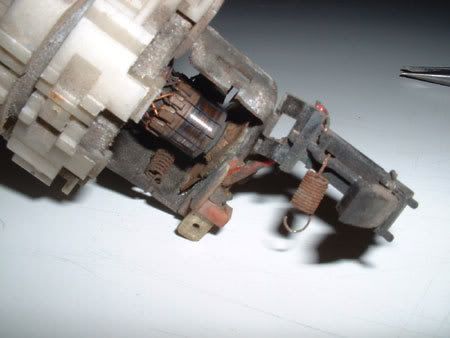
To the novice, the motor may look a bit complicated, but once you know what all the bits are and what they do, it is really quite simple. Turning the fan by hand will show that the motor seems very stiff. In fact it is unlikely that any of the motor parts are at fault, BUT there are some things you can do to the motor to help it, which will improve matters. All the motors that I have looked at, have the same problem. The front bearing (well... it's not actually a bearing, but we'll come to that soon) seems to be the main problem.
The front bearing is actually a phosphor bronze bush, so we'll refer to this as the "front bush" from now on. This supports the main shaft and is located into the motor frame by a spring clip (not easy to see on the photos). This clip is designed to keep the front bush in place. The problem comes when the shaft begins to seize in the front bush. When they get bad, the shaft no longer turns inside the bush. Instead the shaft and bush turn as one in the spring clip hence being able to still turn the fan by hand. The motor is no longer able to turn the assembly.
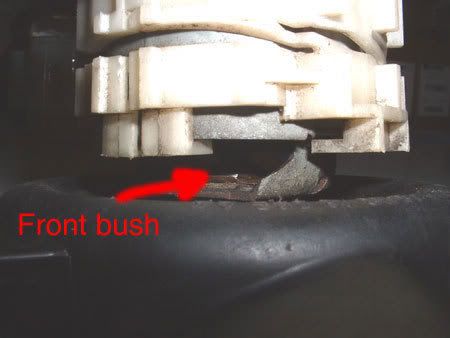
What you need to do now is try and free the bush and shaft. I have found that brake cleaner is best for this job... things like WD40 just aren't thin enough and don't break down the dirt that is jamming the shaft in the bush effectively. With the fan blade lowermost, spray the area arrowed with brake cleaner and leave for 5 miutes or so. Then try turning the fan blades and applying more brake cleaner to the area. I have found that most motors start to free up within 10 minutes.
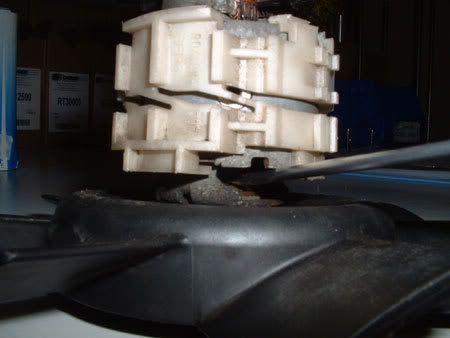
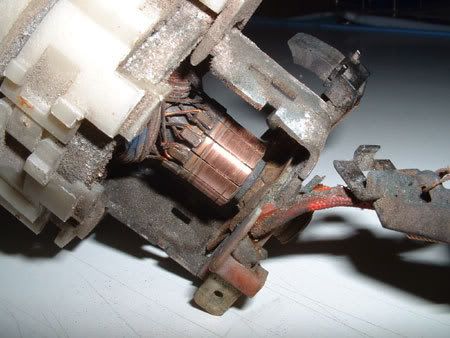
Hopefully now the motor is feeling a lot easier. What you are looking for here is the shaft to turn, but the bush to remain still, held by the spring clip. Keep going with the brake cleaner and turning the fan blades by hand until this happens. You may need to use a screwdriver to lever the bush down the shaft, away from the motor slightly to break any seal caused by dirt. This should really help free off the bush and shaft assembly. Again use the brake cleaner and keep turning the fan blades by hand.
The photo below shows a screw driver being used to gently push the bush down the shaft, probably by less than 0.5mm, but this should be enough to help get it free.
Once the motor is turning freely, you need to lubricate the front bush with some light oil, such as 3in1 etc. With the motor positioned with fan downwards, drip some oil onto the shaft and bush and leave to soak in and then turn the fan by hand and add some more oil.
Now, we need to look at the commutator and brushes. Now, as it is the motor will probably work well, but the commutator will be black with carbon deposits which reduces efficiency.
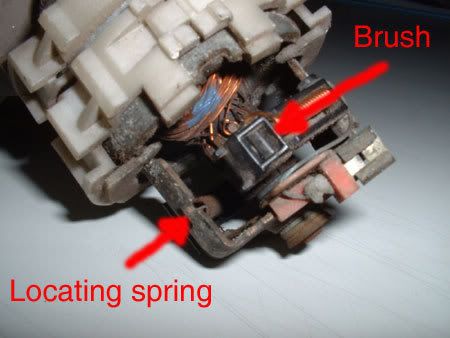
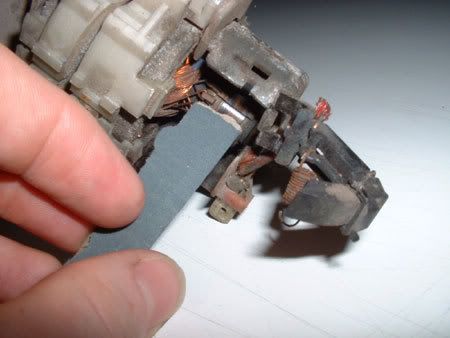
The first thing to do is to release the brushes. To do this, unclip the locating spring from the body of the motor and gently lift the brush from the motor. It is fitted to the motor body at it's pivot and will just unclip. Carefully bend the bruses out of the way. On the right hand photo, you can see the brush with it's retaining spring removed from the motor. You can also see the commutator which needs cleaning up.
To clean up the commutator, get a small amount of P1000 wet and dry and fold it so that you can hold it on the commutator with a finger. Then simply rotate the motor by hand and watch as the commutator comes up all clean and shiny copper. Once the commutator is cleaned up, get a scalpel etc. and very carefully scrape out the straight cut grooves that separate the sections of the commutator. Also gently clean up the brushes where they contact the commutator with some P1000 wet and dry too. The using the brake cleaner again, carefully spray it on the commutator and the brushes to thoroughlt degrease the parts and refit.
Once the motor is built back up, you can now test it. If possible, it is best to run the motor in slowly, starting at about 6 Volts and gradually building up to 12 Volts. This will help the brushes bed in to the commutator, but if you can't do this, running straight away at 12 Volts won't do any damage.
Hopefully now, the motor is running nearly as good as new.